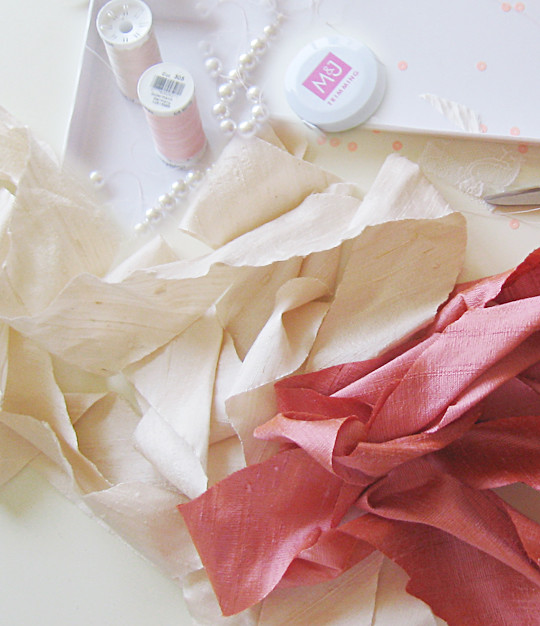


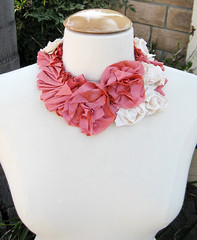
Materials:
* 2″ Dupioni Silk Ribbon in Amour & Cameo – about 3 yards each {they have more colors to choose from}
* Loose faux pearls
* Gutermann Thread in Petal Pink & Eggshell …Needle/Scissors {for all projects}
Steps:
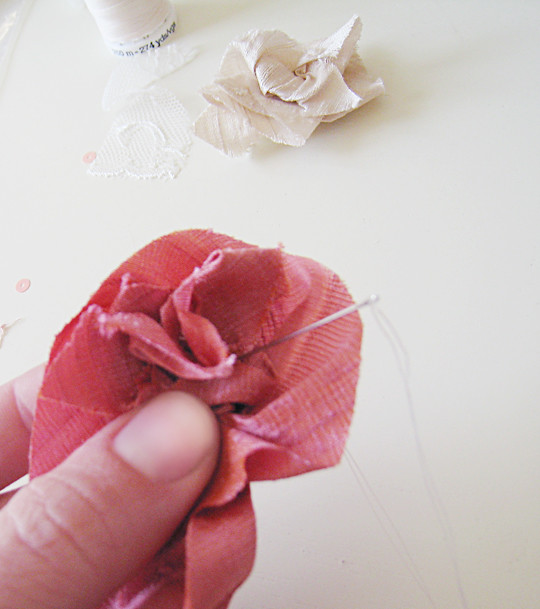
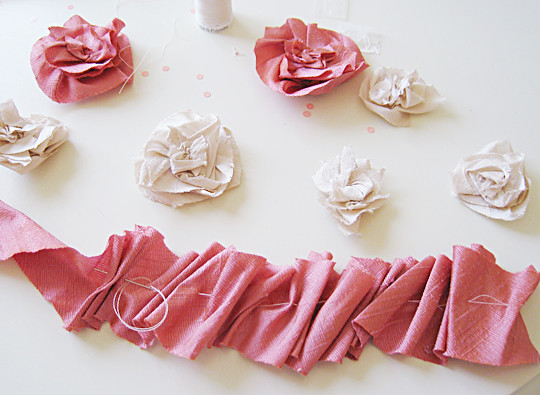
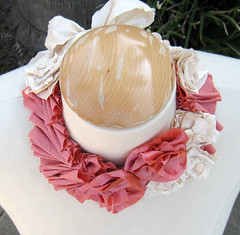
1. With the silk ribbon, create two large flowers {by twisting/bunching/stitching together} in the darker shade & about 5 small flowers in the light beige
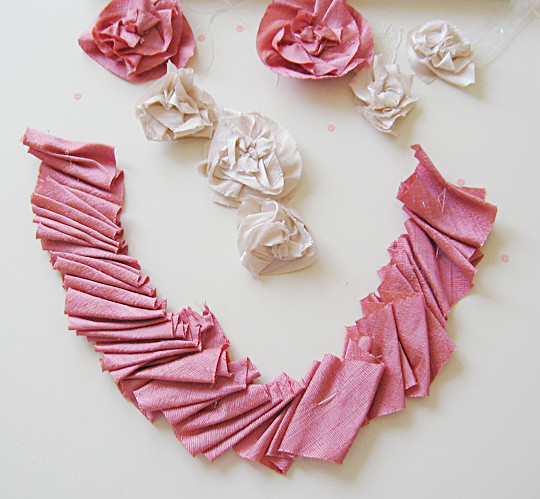
2-3. With the remaining darker silk ribbon, create a dishevelled accordion look by pinching and stitching loosely through it. Leave it looser on one side so you can move it around and tighter on the other …creating two distinct looks. Lay in U shape
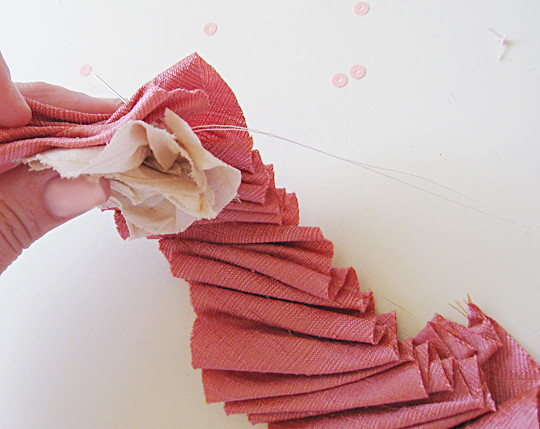
4. Place flowers on accordion base to liking
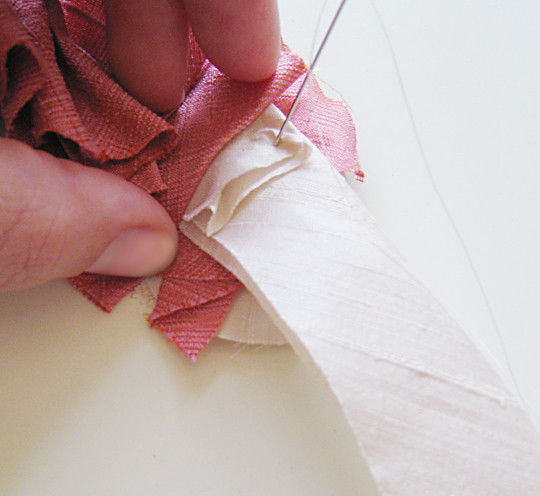
5. Hand-stitch flowers in place
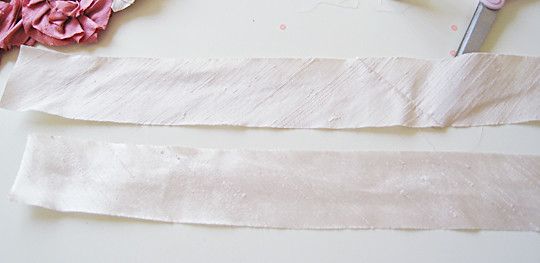
6. With remaining light beige silk ribbon {about 44″} cut in half
7. Fold in half and over and stitch to ends of accordion base securely
8. On one side only, fold ribbon, run needle through it, place loose pearl then fold ribbon again and push through and repeat. I used 4 loose pearls. I did this to one side only. You can to both or neither if you like.
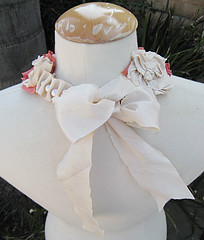
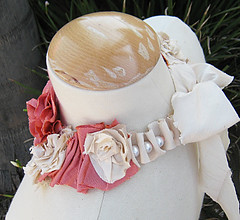
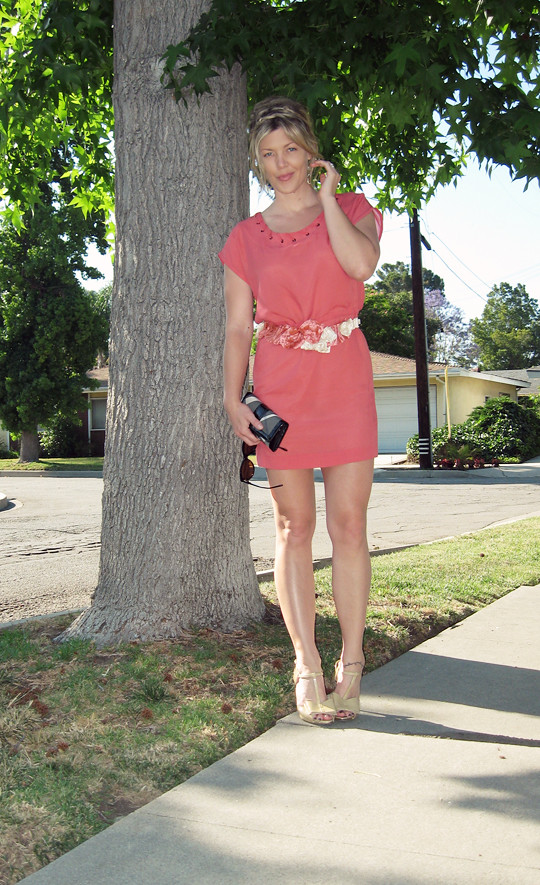
Tie it in big bow or knot around your neck and wear it over a simple white t-shirt, jeans & a pair of fabulous shoes. Or, wear it as waist belt over your favorite dress as seen below …
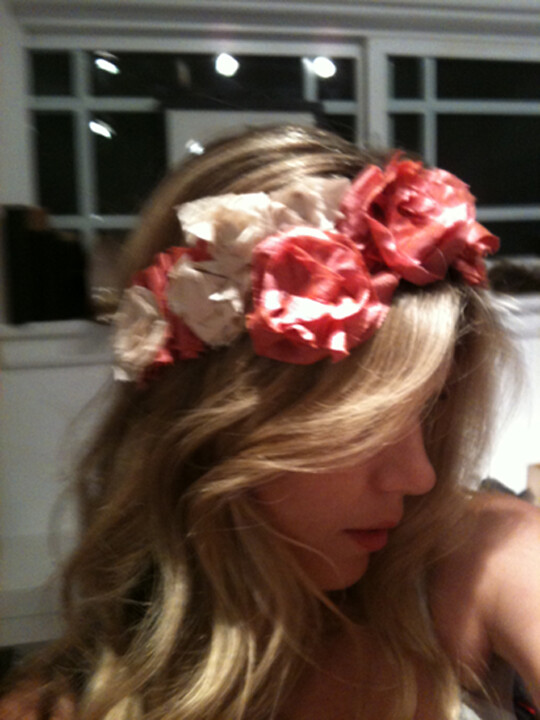
…or even, if you’re daring, wear it in your hair 😉 Have Fun!