I’m always worried now when I have an idea for a DIY that one of the other DIY bloggers has already done it. Sadly I don’t have time any more to look at too many blogs so please know that if someone else has done this, it’s by complete coincidence that I have too. I have learned over the years of blogging that we DIYers tend to all think alike. So hopefully, this hasn’t been done before HOWEVER, the idea is not too far off from those hideously bedazzled sweatshirts from the 80’s old ladies used to wear… right? But so much better 😉
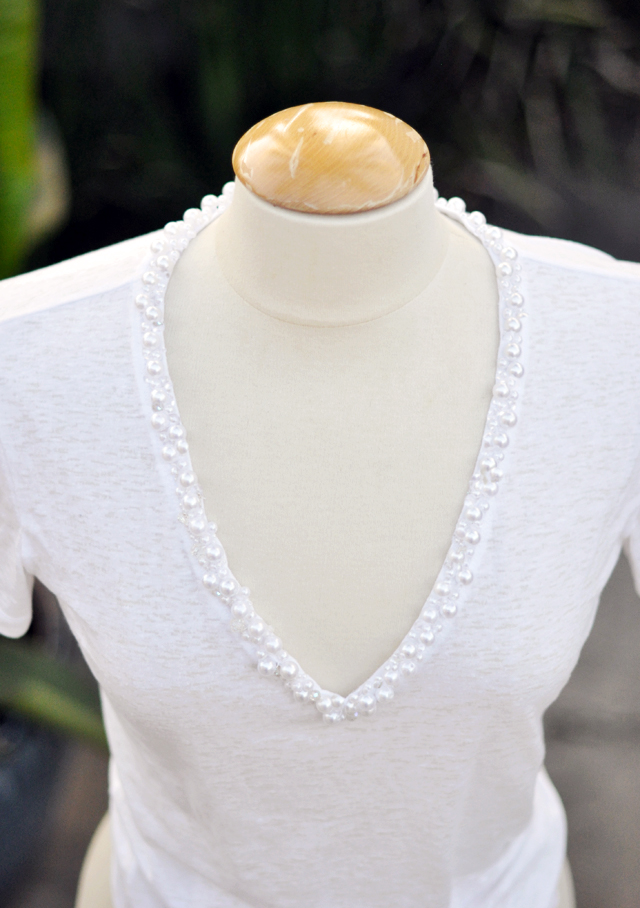
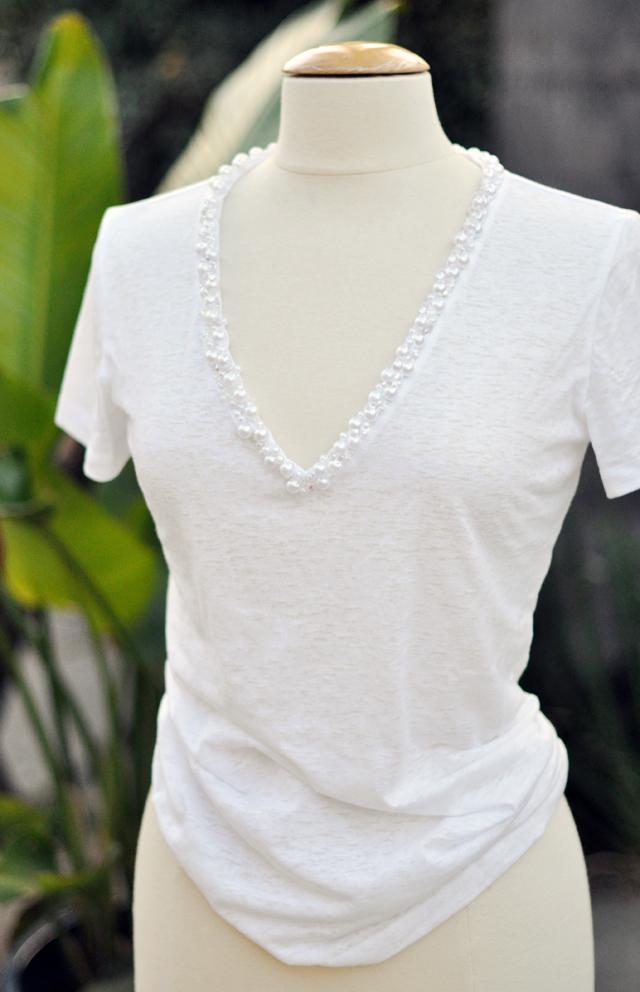
*NOTE* the “V” looks deeper on the dress form than it is in reality BUT your pearls or beads WILL weigh it down more than it normally sits on your chest.
*NOTE* Once embellished, your shirt will have to be dry-cleaned or carefully hand-washed and hung to dry. It’s the price you pay for fashion 😉

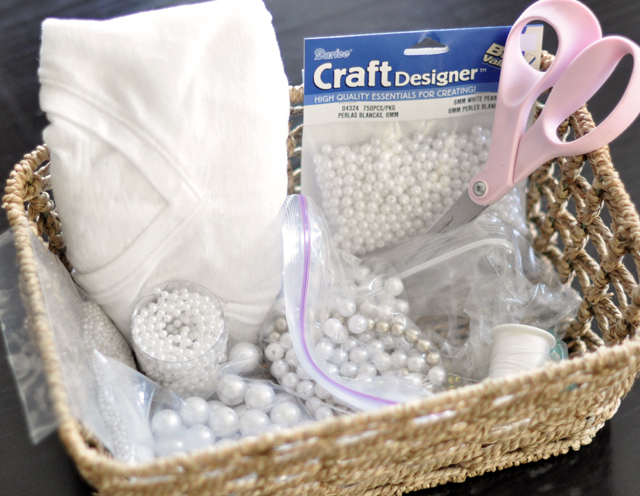
* A V-neck T-shirt {though if you prefer it, a crew neck would be pretty as well – and I would say to do the edges of your sleeves to complete the look – but make sure you can still stretch the neck over your head or use a blouse that has a button neck closure}
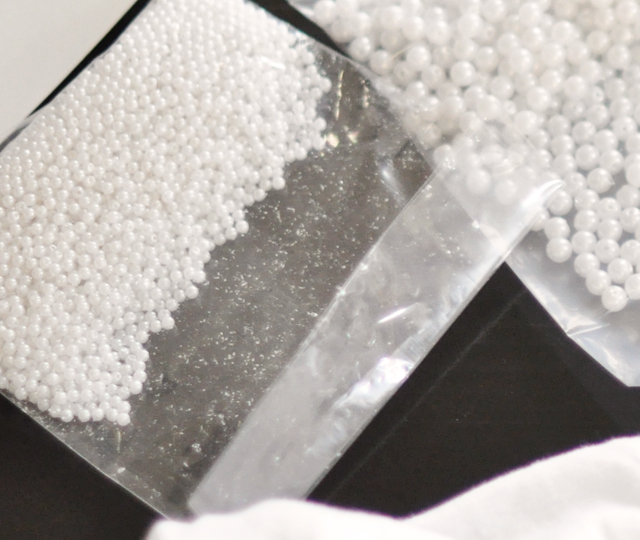
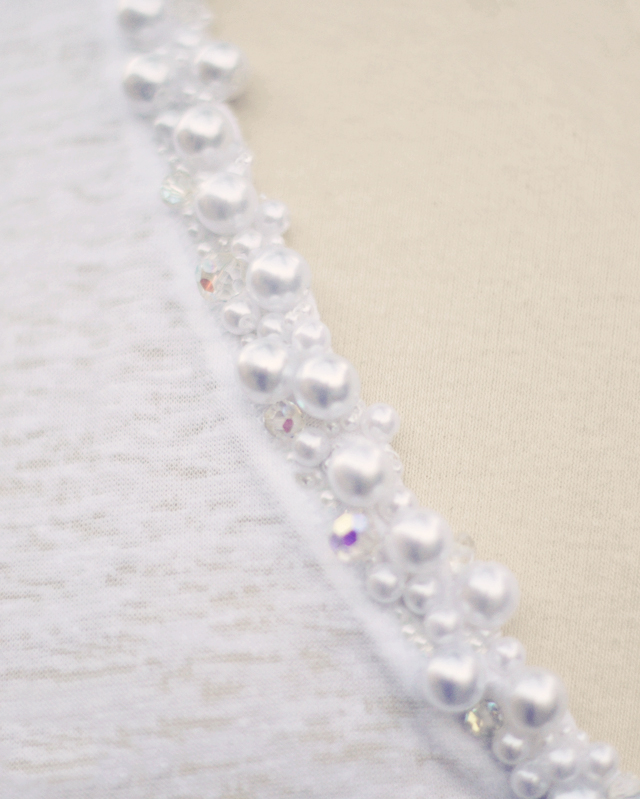
* 3 Different sizes of pearls… or you may use any kind or color of plastic beads {glass beads are too heavy for this}
* Needle/Thread/Scissors

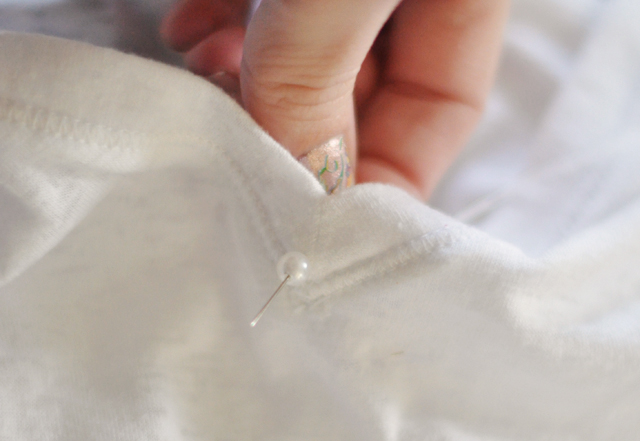
* Beginning somewhere near the center of your V and with your middle sized pearl or bead, thread your needle through the back of your T and hand stitch your bead into place.
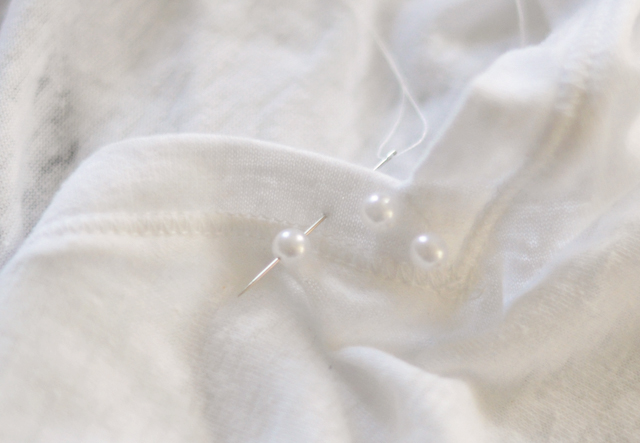
* Continue up both sides, staggering your mid-sized pearl or beads onto your V.
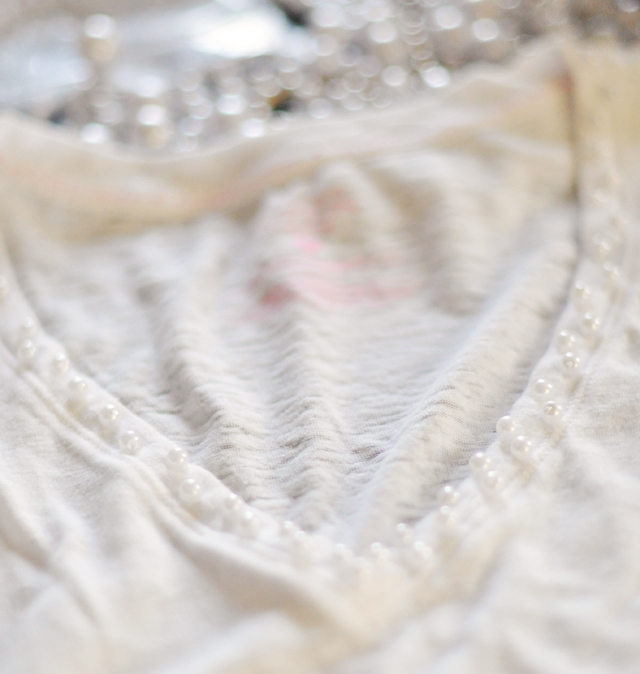
* It should look something like this.

* Once you’ve gone all the way around your V with your mid-sized pearls, take your largest pearl or bead and begin filling in the spaces in between, all the way around.
* Finally, take your smallest pearl or seed beads and fill in the rest of the blanks with these, layering on two at a time in some areas.
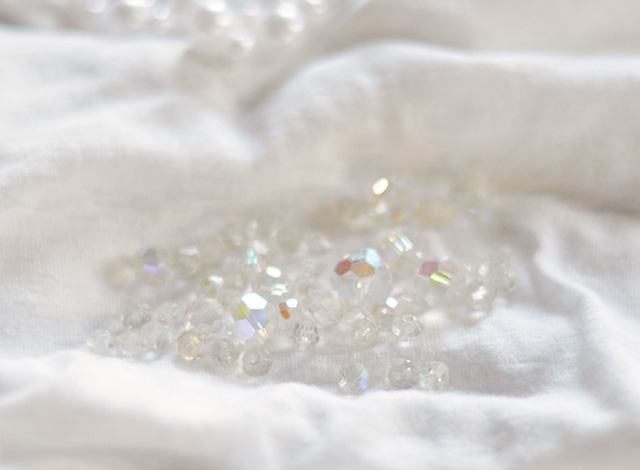
* At the last minute I decided to layer in a few of these vintage Aurora Borealis beads for a little extra sparkle.

Have Fun!